

Hello guys, how many of you want to learn ethical hacking! So before you start to learn Ethical hacking you need to install Kali Linux. Today in this blog you can see how you can install Kali Linux on your system. If you think about your data then don’t worry about that because we use Virtual Box for installing Kali Linux. So are you excited…..

Information about Kali Linux –
Kali Linux is a Debian-based Linux that contains 600+ tools that are geared towards various information security tasks such as Penetration Testing, Security research, and more. It is best to install Kali as a VM on Virtual Box.
Before we start the installation you need to know about Virtual Box. So VirtualBox is open-source software for virtualizing the x86 computing architecture. It creates a virtual machine where the user can run another OS (operating system).
Steps to install Kali Linux –
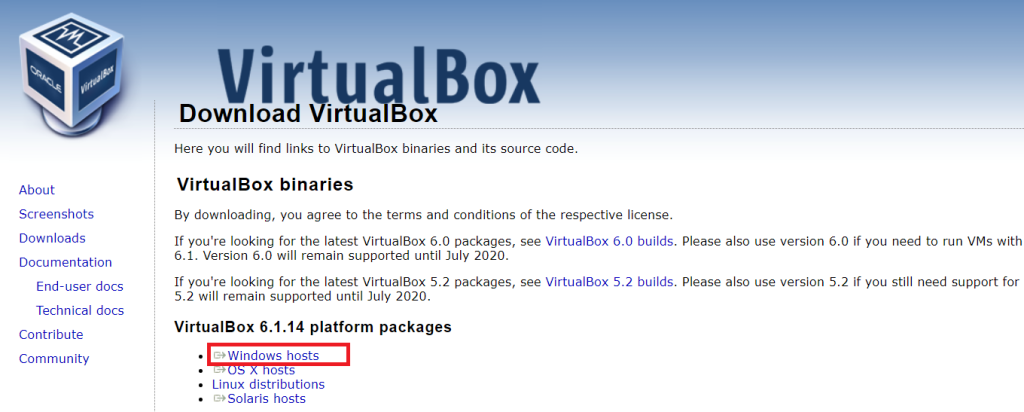
To install Kali you need to install Virtual Box so click on the below button to get Virtual Box.
Now after you get virtual box install it.
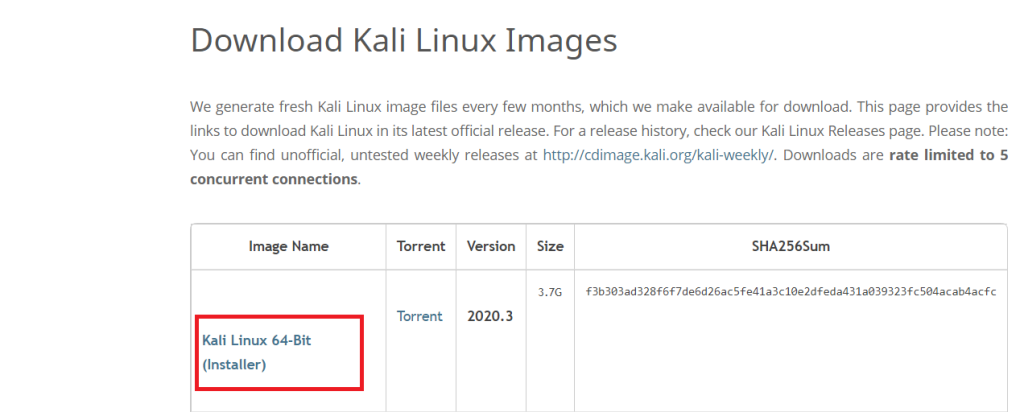
After that, you need to download Kali Linux, for that you need to click on the below button and download the Kali Linux image as showing in above image
If your Kali Linux Downloading Completed then Follow below steps :-
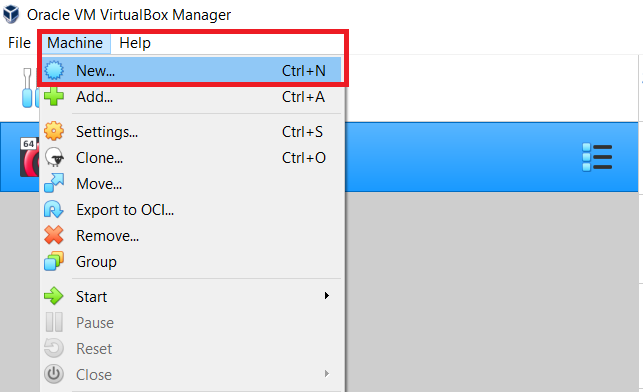
1 . Open Virtual Box, go to Machine and press new to create new VM.
2. Now enter the name of your VM whatever you want, after that, you need to select “Linux” in Type and “Debian(64-bit)” in Version like the below image. if everything is good then click on next.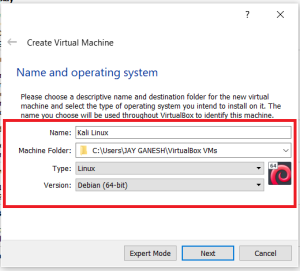
3. In this step you need to give a memory to your Virtual Machine. If you have 4GB ram in your system then give 2GB of RAM and if you have 8GB of ram then give 4GB RAM here. After giving ram click on next button.

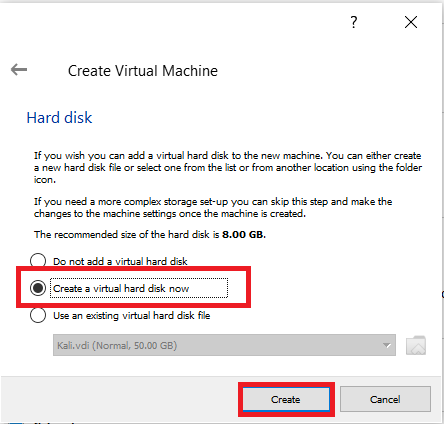
4. Now in the next step go with “Create a virtual hard disk now” option and click on the Create button.
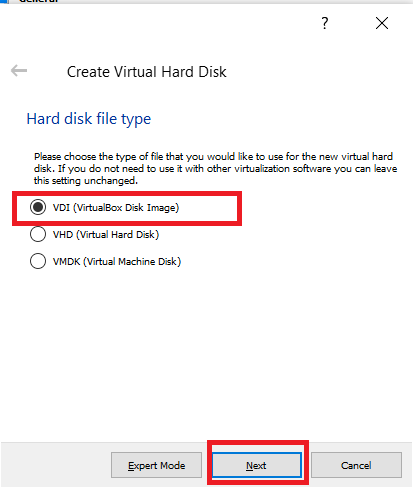
5. After that select VDI(VirtualBox Disk Image) and click on the next button because we have an image file of Kali.
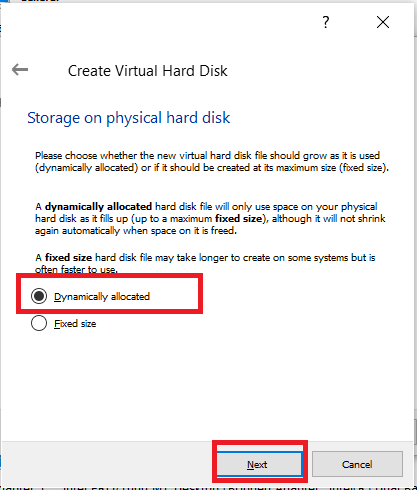
6. In this step we assigned storage for Kali so click on the “Dynamically Allocated” option and press the Next button.
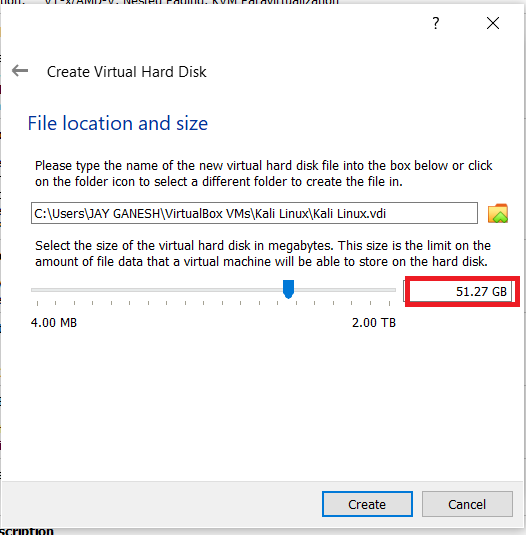
7. Now in this step you need to assigned 50 GB or 50+GB storage. If you select less then 50 GB storage then it maybe gives you an error. So after assigned storage click on the “Create” button.
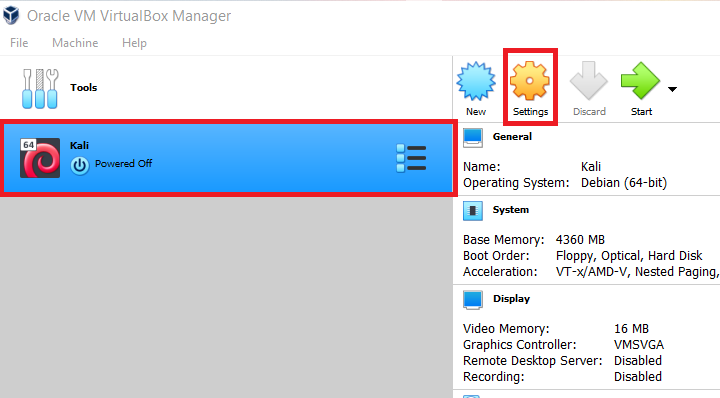
8. After click on the create button you can see Kali Machine on Virtual Box. So now select that Machine and click on the setting button like the below image.
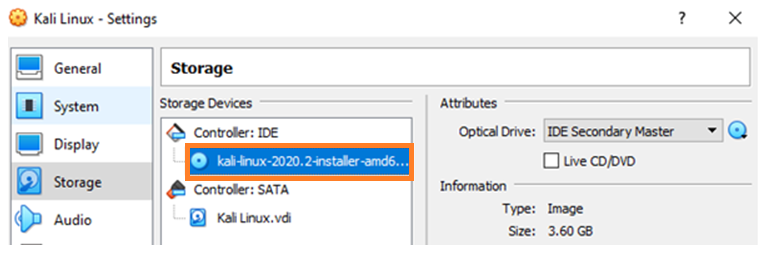
9. Now you can see settings so in setting click on Storage and you can see Empty IDE controller. So click on that empty controller and after that click on the disk image which is available on the right side. once you click on that disk image you need to select the Kali image file which is already downloaded on previous steps.

10. After selecting Kali image click on that image file and on ok button.
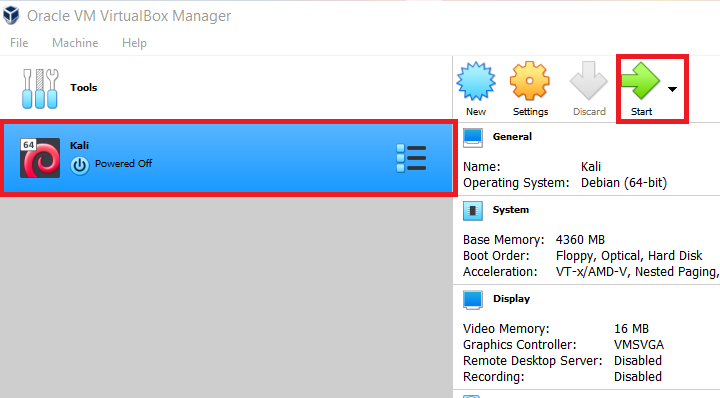
11. Now let install our Kali Linux, So for that, you need to start our VM machine by clicking on the Start button as below image.
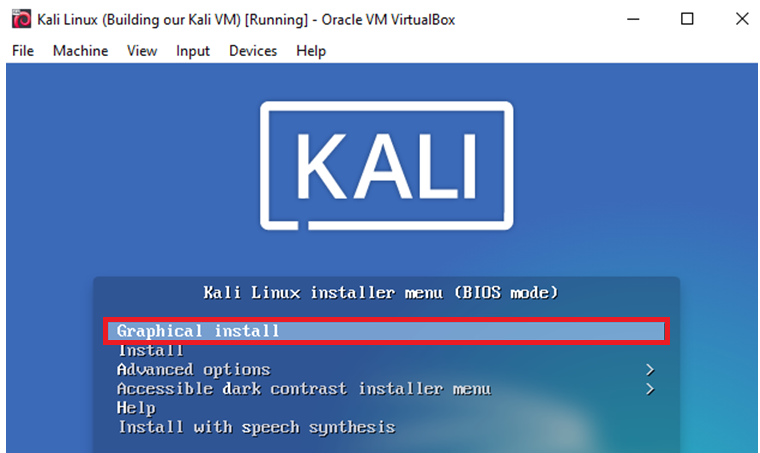
12. After clicking on the start button you can menu like the below image, so in that menu, you need to select Graphical install by pressing the enter button on that option.
13. Now select language whatever you want and press continue.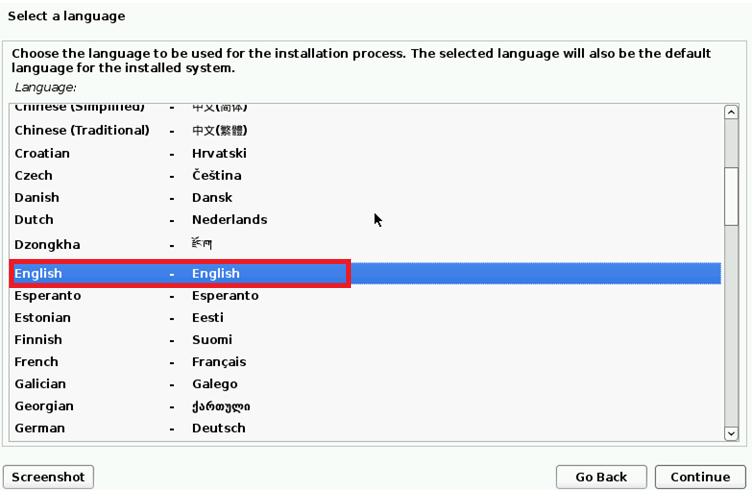
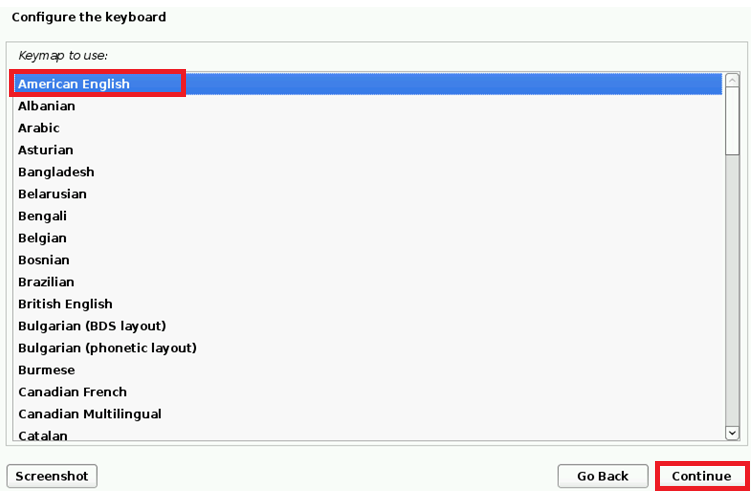
14. Once you click on the continue button you need to configure the keyboard. After configuring the keyboard click on the continue button.
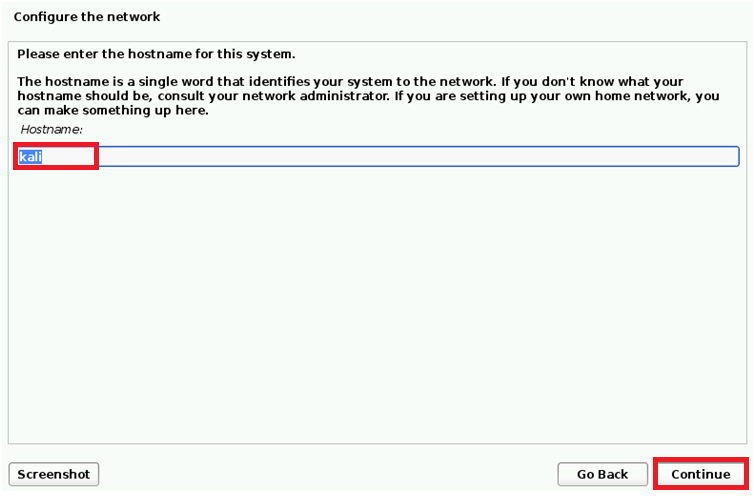
15. Let’s give hostname to our Machine, once you give hostname click on continue.
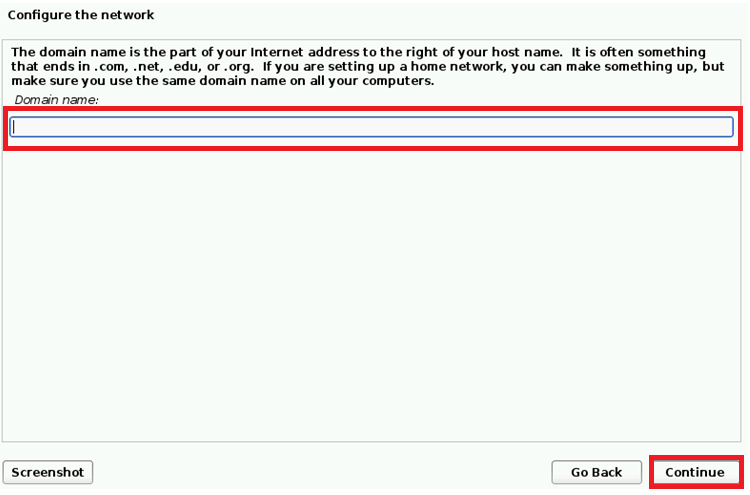
16. Now you didn’t need to enter anything in the domain name so simply click on the continue.
17. After that you need to give your user name and then after in the next step you need to choose your password. Once you completed your username and password setup click the continue button.
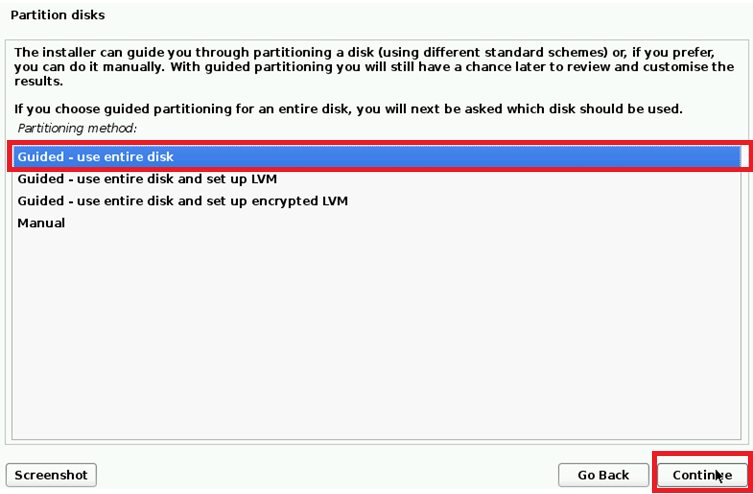
18. Now in the next step you can see the partition disk menu so select “Guided- use entire disk” option and click on the continue.
19. You can see on the below image now you need to select your partition which is already created on previous steps so simply select that partition and click on continue.

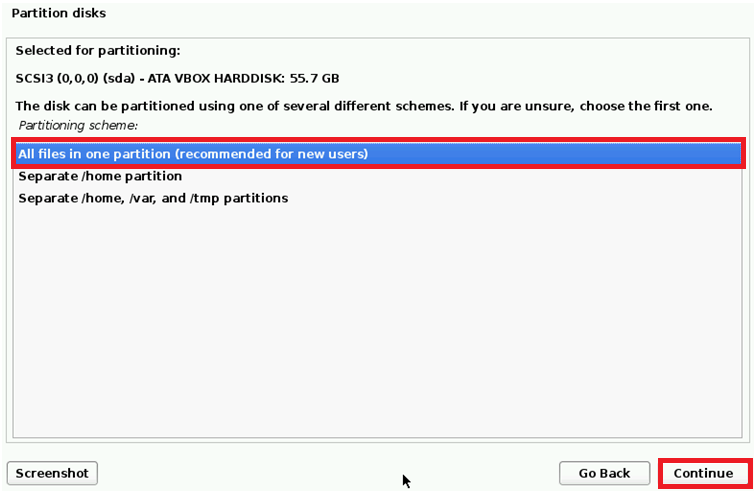
20. Now in the next step select the “All files in one partition” option and click on the continue button.
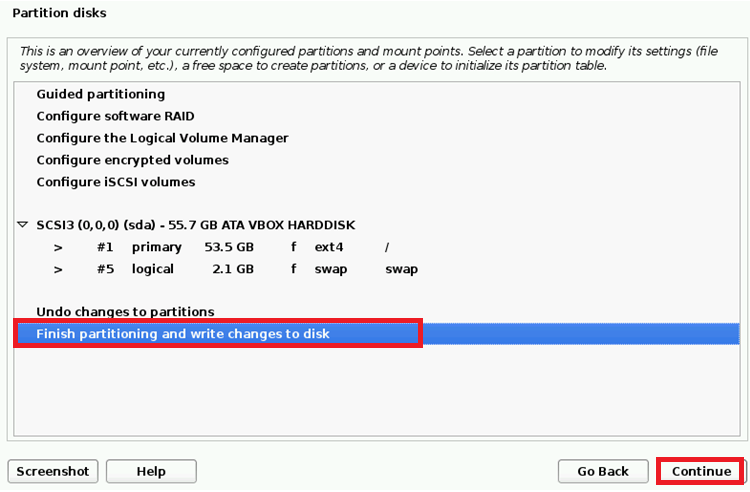
21. Once you are done with that select on “Finish partitioning and write changes to disk” and click on continue.
22. In the next step you can see the Yes or No option so simply click on the Yes option and continue our setup.

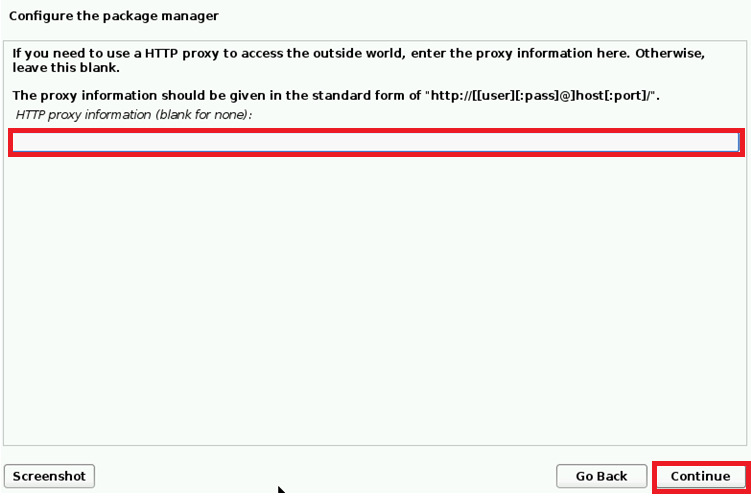
23. In Configure the package manager left blank and click on continue.
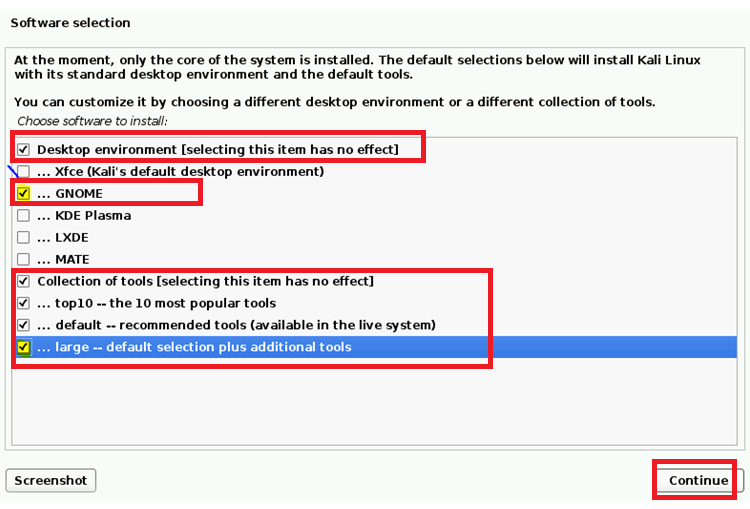
24. Now this step is very important in this step we select our desktop type so in my case I ‘have selected GNOME desktop because it is user-friendly. so select that option which I have mention in the below image and press continue (It may take time to install).
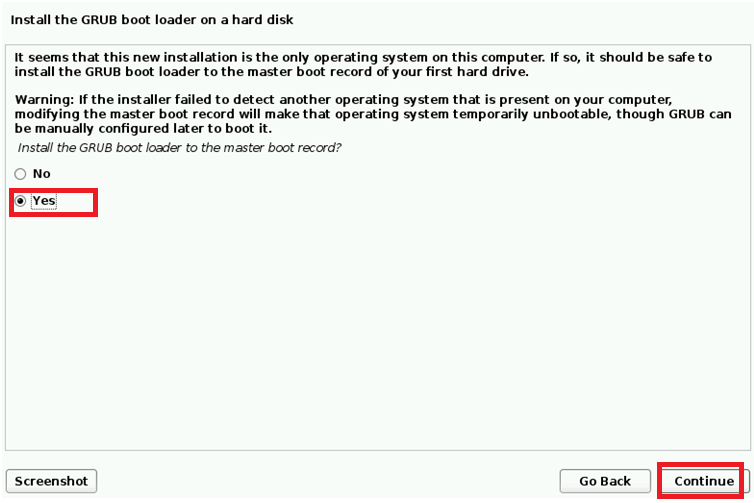
25. Now after some time you see one option to “Install the GRUB boot loader to the master boot record”. so simply select Yes and press continue.
26. After you need to select “/dev/sda { }…. “ option like below image and press continue. (Do not select Enter device manually option).

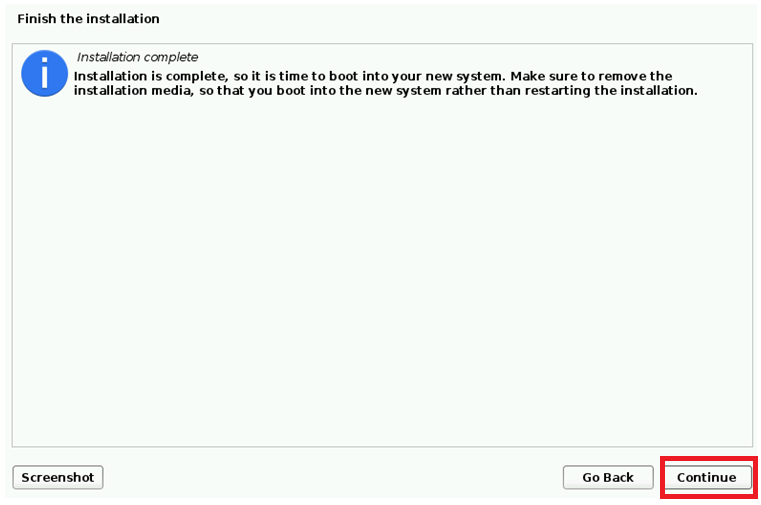
27. Now your installation is finished so press continue and login with your system.
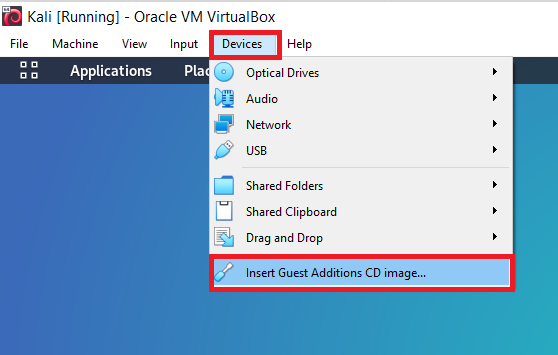
Steps to get Fullscreen –
After start your Kali go to device and click on “Insert Guest Addition CD image”.
Once you click on that option you can see disk image in your Kali Linux, so open that image and right click in that image and select open terminal.

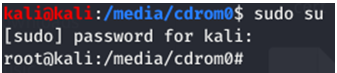
Now in terminal write “sudo su” and enter your Kali Password like below image.
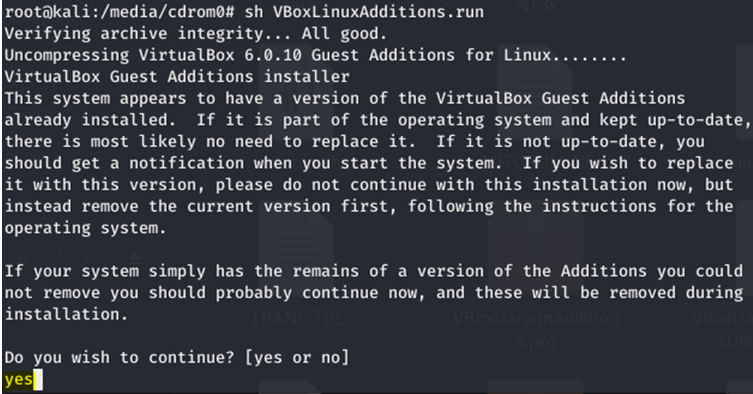
After that write “sh VBoxLinuxAdditions.run” and after that write yes.
Now you need to restart you system. Once you restart you have full screen.
So I hope this article is very useful for you. if you like this article and you have some problems in installation so comment me on below comment box.
Also Visit This Articles :-
- How To Get Started With Python?
- How To Create A Python Snake Game Using Pygame.
- Best Free Games For PC In 2020
- How To Chrome OS Install On PC.
If you have any doubts any suggestion or any query DM us one below Social media handles
Our Social Media Handles:-
Instagram Handle :- https://www.instagram.com/smgplaza/
Twitter Handle :- https://twitter.com/smgplaza


